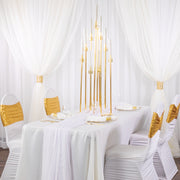
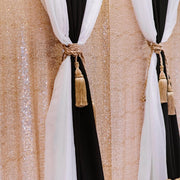
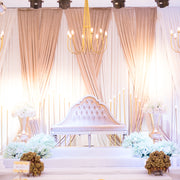
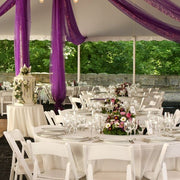
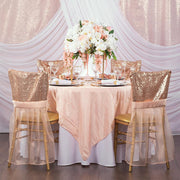
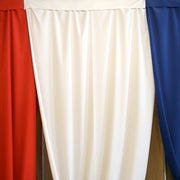
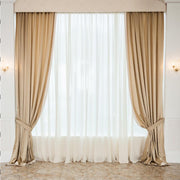
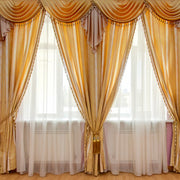
Drapes and curtains are a great way to elevate any space for parties or everyday use. One thing party d...
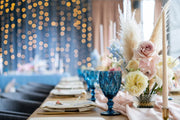
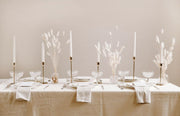
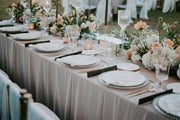
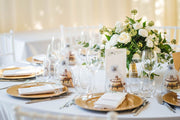
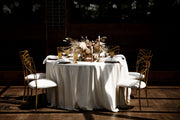
Table decors play a vital role in designing your space for events and gatherings. After all, your guest...
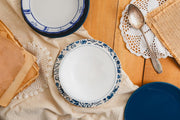
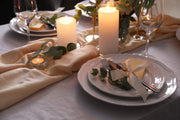
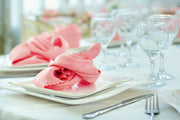
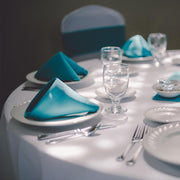
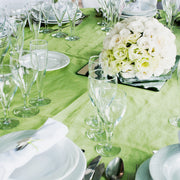
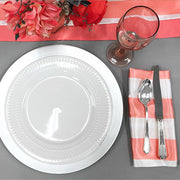
Table setting is all about knowing the proper placement of plates, glasses, utensils, and linen napkins...
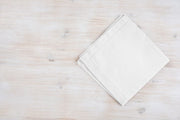
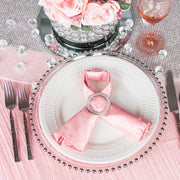
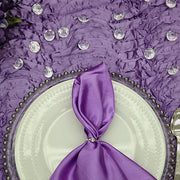
Napkins have evolved from mere tools for wiping mouths and cleaning spills to stylish decor that compli...
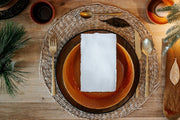
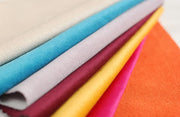
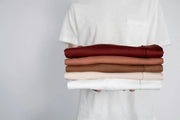
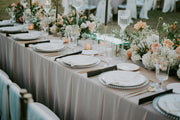
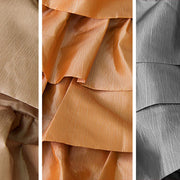
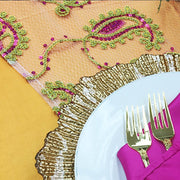
Table linens are a crucial element in setting the perfect ambiance for any event. The right table linen...
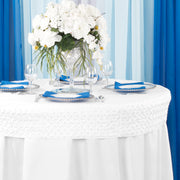
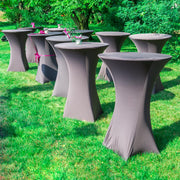
Table skirts are decorative elements that can be placed along the edges of your table. They can hide un...
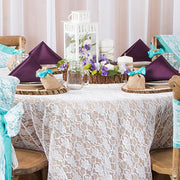
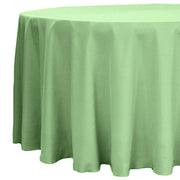
Tablecloths are a great way to dress your tables both for parties and for everyday use. Not only do the...
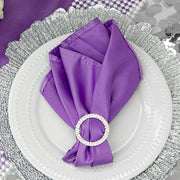
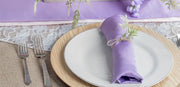
Dress your dinner parties with table napkins to instantly elevate your dining experience. Add a touch o...
Spandex fabric offers more than just wrinkle-free tablecloths and chair covers! This versatile linen unl...
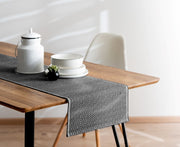
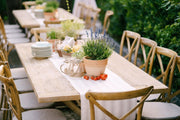
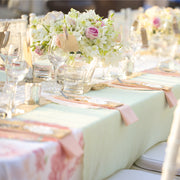
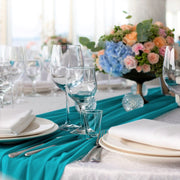
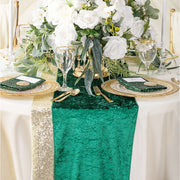
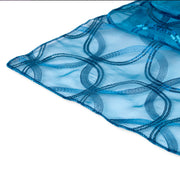
Table runners are an important decorative accent in table decorations. They bring texture and depth to ...
Table runners are adaptable decor items that enhance the look of any tabletop while protecting the surf...
Table skirting is an important part of event decoration. Turn your party tables into a stunning party c...
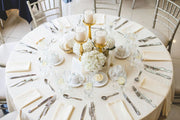
In event decoration, proper table setting is important to make sure you get a dining experience to reme...
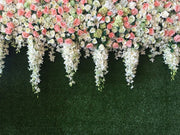
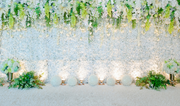
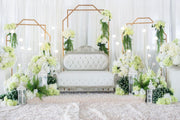
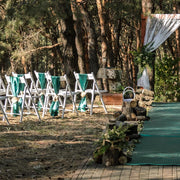
Are you looking for a decor element to elevate your special occasion? Set up a greenery backdrop that wil...
Looking for ways to dress up your table setting? Table runners are a great way to instantly elevate you...
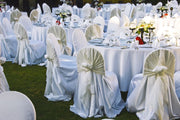
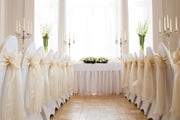
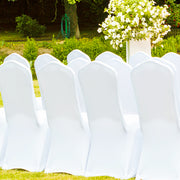
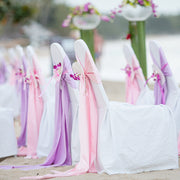
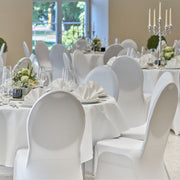
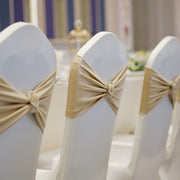
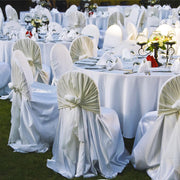
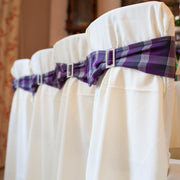
Do your dining chairs still work but may use a little jazz and updating? Trust chair covers to bring co...
Table runners are a great way to instantly elevate your tablescape at any party. It’s a staple in every e...
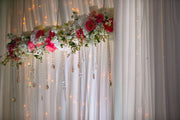
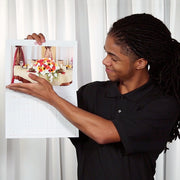
Backdrops give a wow factor to your events by improving the vibe and ambiance of your venue. They are the...
Looking to level up your dining table look without spending more on impractical decorations? Table runner...
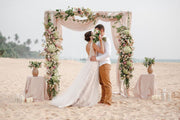
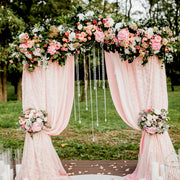
Wedding arches serve as focal points in ceremonies, framing you and your partner as you exchange vows. Th...
Dressing your party tables with table runners is an easy way to instantly elevate your table setting. Thi...
Table Runners are a great way to decorate your dining tables for any occasion. This understated yet class...
A wedding arch is an excellent decor piece that provides a personal and romantic touch to your big day. I...
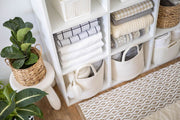
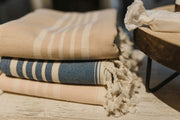
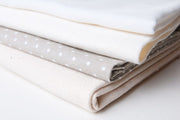
Linens are a vital part of home and event decor. From bed sheets to tablecloths and napkins, they provide...
Storing your table linens well is an important part of event planning. It allows them to stay pristine an...
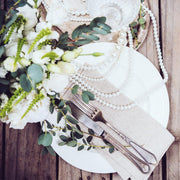
Using vintage linens for your wedding, dinner banquets, and formal parties is a great way to give your e...
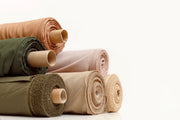
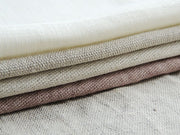
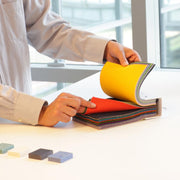
Purchasing fabric rolls may be both an enjoyable and challenging experience. There are numerous factors t...
Keeping your table linens clean and pristine is crucial to creating a luxurious dining experience at any...
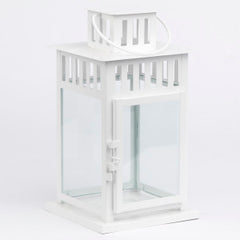
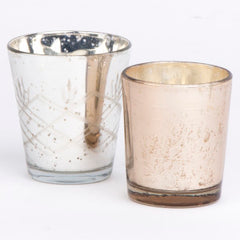
Candles are great decorative pieces to set a classic and romantic vibe to any dinner party. One thing yo...
Wholesale napkins are a popular choice with event planners and organizers as their durability allows for ...
Many high school students consider prom to be a milestone moment in their lives. It's almost a rite of pass...
Linen napkins are a great way to enhance your dining experience and create a luxurious tablescape. They’r...
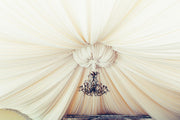
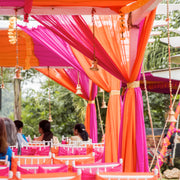
Draping is one of the most effective ways to dress up your event space and transform an average venue int...
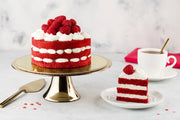
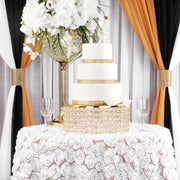
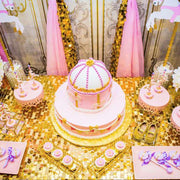
Anyone who has been near a dessert table will undoubtedly be enticed by beautifully arranged cakes and pa...
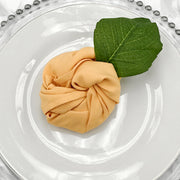
Linen napkins are a perfect way to add a refined touch to your dining setups. Clean and orderly napkins ...
Chairs are among the most important and comfortable items you can have at home or gatherings. They offer ...
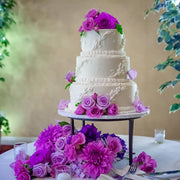
Cakes are the perfect dessert to cap off any event. They are a delightful way to finish your event’s dini...
There’s something about chair covers that make them turn even the most ordinary chairs into focal points....
Cakes are an enduring component for all special occasions. Whether it be romantic weddings, fun birthday ...
Linen napkins have been a timeless addition to finishing an elegant dining setup. The soft and fine linen...
In any event hosting and planning, tablecloths are an essential part. They make your table setting look c...
Throwing parties and planning events are enjoyable activities that go well with setting tables with elega...
Tablecloths are an essential part of event decor, which contributes a lot to the overall style of any din...
When it comes to organizing special events, simple details can have a big effect. Tablecloths serve as a ...
Table runners have been a staple in event decor for years, adding a sophisticated finish to all kinds of...
One of the difficulties in event planning is ensuring that tablecloths remain wrinkle-free during transpo...
Tablecloths are a staple for any event’s dining experience, whether it’s a casual get-together or an eleg...
Choosing the perfect tablecloth size can be challenging. Tablecloths come in a wide range of sizes, and ...
Table setups are a crucial element in establishing your event decor. Properly boxing a table is a perfec...
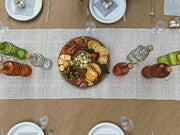
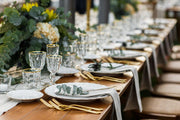
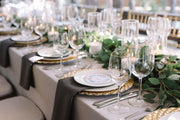
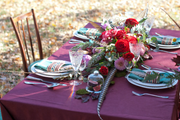
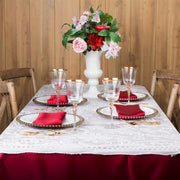
A welcoming and appealing table setting includes more than just dishes and silverware. Tablescapes or the...
Decorating your next event is now in the power of your fingertips. If you’re tired of the never-ending q...
Have you found yourself searching for affordable party decor near me? Let CV Linens help you with your sea...
Are you ready to get more out of your CV Linens shopping experience? The wait is finally over as CV Linens R...
When it comes to finding high-quality linens and party supplies at affordable prices, CV Linens is a trusted...
Shopping for event decor online can be a daunting experience, especially when you can't physically see the p...
** CALENDAR REQUESTS ARE NOW CLOSED **
2018 Calendars!
We’re so excited about what the New Year will bring for eve...
CV Linens Annual Susan G. Komen Race Support
Something You May Not Know About Us…
This weekend we are waking up e...
Radiant Orchid
Pantone has named “Radiant Orchid” as 2014 Color of the Year!
Our take on Radiant Orchid is C...
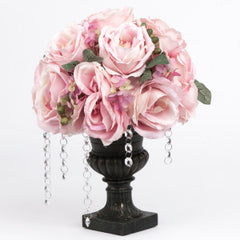
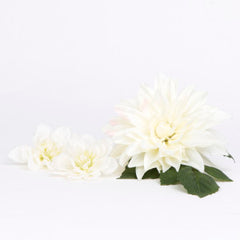
Flowers in bloom are a staple in event decorations. From bridal showers and weddings to baby showers an...
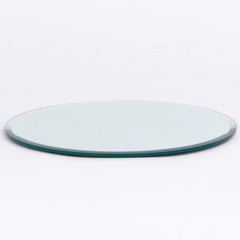
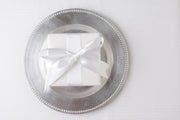
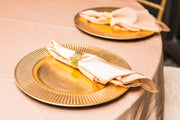
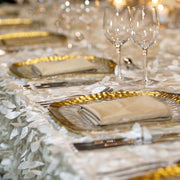
You might be wondering: what is a charger plate? What is a charger plate used for? And what is the purpose o...
How to Choose Chair Covers for Events
Seating is one of the most essential parts of hosting an event...
Rectangular Table Overlay Sizing Combinations
Designing the tablescapes for bridal showe...
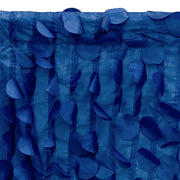
We are pleased to cast the spotlight on one of our favorite classic beauties! Pinchwheel tablecloth is the solut...
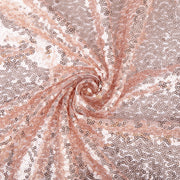
If there is one thing you should know about CV Linens, it’s that we take sparkle seriously!
We have built our r...
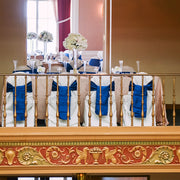
One of the most important aspects of a wedding or event is seating! Even if you don’t immediately notice the chai...
We try not to play favorites when it comes to linens, but there is a standout among us. Not all of our custo...
When it comes to event styling, every detail matters. From the choice of color scheme to the table linen...
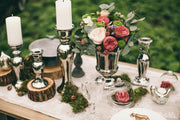
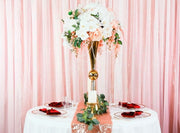
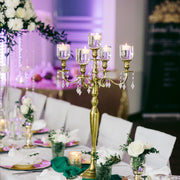
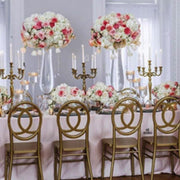
Candle holder candelabra wedding centerpieces are among the most versatile and elegant table centerpiec...
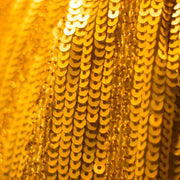
14 Most Common Questions About Our Sequin Fabric
They have a flash of glimmer and a unique textu...
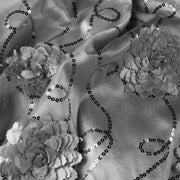
If you're looking for an elegant and luxurious touch for your next event or celebration, satin rosette linens ar...
How to Set Up and Style Reversible Riser Centerpieces
If you are looking to make a statement wit...
Achieving an elegant and glamorous event from top to bottom can easily be done by using chair covers...
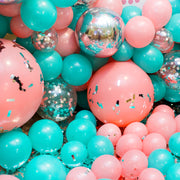
Are you looking for an easy way to impress your party guests with bold and colorful decor? Using ballo...
Tablecloths play a vital role in setting the tone for any dining or gathering space. They not only protect t...
When it comes to planning special celebrations in life, surprisingly, it’s the smallest details that'll...
When it comes to event design and decor, the right backdrops and ceiling drapes make all the difference.
W...
Event designers and wedding planners in America increasingly use drape panels as a standard for wedding bac...
Round table overlays are an essential element when it comes to decorating your event tables. They not only ad...
Tablecloths are critical to decorating an event because they protect the table and make it aesthetically ...
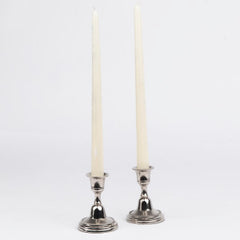
Candles and their flickering lights can effortlessly make any event appear romantic, cozy, and relaxing. The...
Charger plates are essential in table settings and for various practical reasons. It helps if you know why y...
Drape support clamps are designed to attach to the top of your drapes and help keep them in place. They can ...
Reach the pinnacle of style for your wedding or special event with our accordion crinkle taffeta tablecloths...
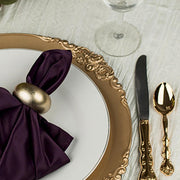
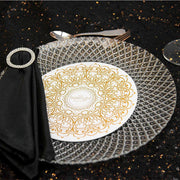
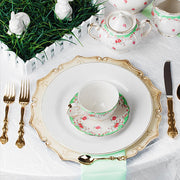
Craft an unforgettable feast by finishing off your tablescape with our stunning 13-inch gold charger plates!...
Organizing events and parties can be quite a challenge. You need to consider setting up and arranging many i...
If you are planning to do some wall décor using flowers, there are a few ways that you can make a flower bac...
Aiming for a simple, elegant, glamorous, or outstanding event? In either case, using the appropriate décor c...
Preparing and decorating a special event yourself can be a daunting task. You have to consider everything ...
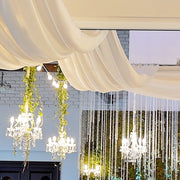
Many people might not know that ceiling drapes are a great way to transform any venue space. Drapes can be u...
Lamour satin, also known as bridal satin which literally translates to “the love satin” is one of the many...
Dazzling glittery fabric has been a party staple because it quickly adds a posh aesthetic to backdrops and ...
Whether you are planning to host a formal dinner or a casual lunch at home, your table setting will not onl...
Chiffon table runners are sheer, and lightweight fabric is popular for many different reasons. It is the re...
Planning a wedding or huge event, your tabletops is among the most exciting moments to plan. As your guests...
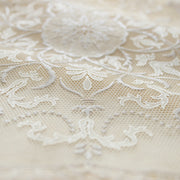
When table linens are mentioned, more than likely cloth linens will be the first thing that comes to mind. ...
There are many different materials for wedding decorations, but no material is more glamorous than velv...
New year, new events, new ways to style! Ramping up to 2018 we knew our aim would be to continue focusing ...
Large Rosette Table Trim Design
Creativity in the event industry is about leading by desi...
Pipe & Drape Set Tutorial Setup
Trying to put together a pipe and drape set can be tricky for first time u...
Simple Fabrics with Easy Maintenance
I think we can all agree, ironing and steaming linens can be a chore.
We kno...
The Difference Between Sequin Products
Given our usual eagerness to price match with competitors, it can be dish...
Exclusive Chair Covers within Budget
As leaders in the event decor industry we've been asked several times how t...
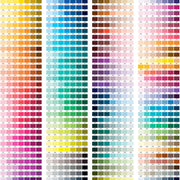
2016 Pantone Spring and summer Color Applications
It’s understood that Pantone are the tastemakers worldw...
Since its debut, our new payette sequin fabric line has been dazzling our customers with it’s selection...
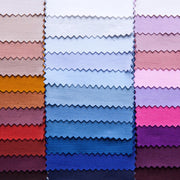
Informative Wholesale Linens Different Dye Lots
At CV Linens, we are filled with questions about shade differe...
Gold, silver, and dripping with crystals, our new crystal wedding centerpieces are ready to dazzle your spe...
We have a surprise for you.
We’re the kind of people who are always bursting at the seams when it co...
We’ve been so excited about expanding our pipe and drape backdrop line lately that we figured it would be the per...
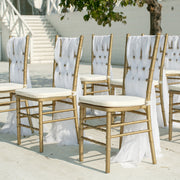
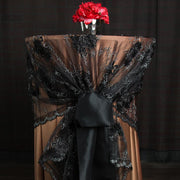
Try Our New Layered Skirting Chair Back Cover
Are you ready to shake up your special event chair deco...
Emerald green satin is a wonderful fabric choice for any event. Its vibrant and luxurious appearance can elevate ...
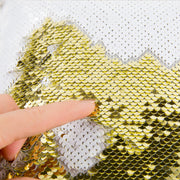
Without a doubt one of the biggest sequin trends this year, Flip Up Reversible Two Color Sequins have officially mad...
You (Really) Don’t Want to Miss These…
Summer is here which means it’s time to break out new decor for your events! ...
Newest Event Decor: Rosettes, Drapes, Curly Willows
With a diverse range of new product you’ll be sure to stand o...
Glitz, glam, and sparkles…oh my!
Be on top of the decor game with our latest sequined arrivals.
Glitz Sequin Dr...
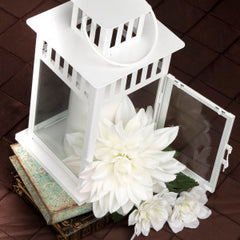
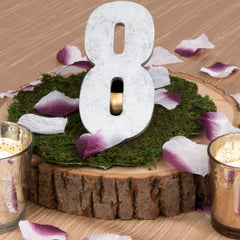
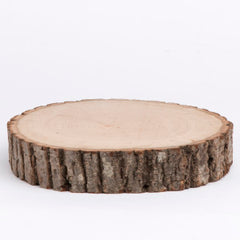
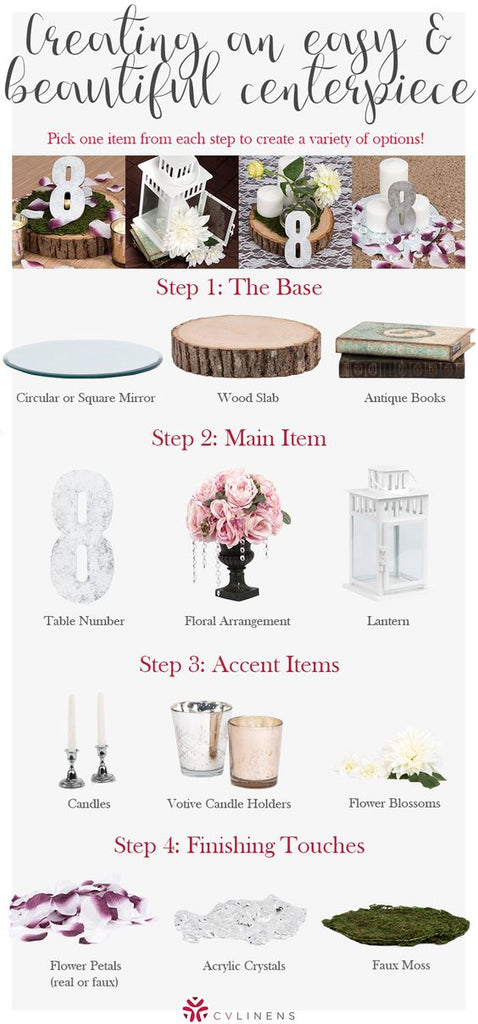
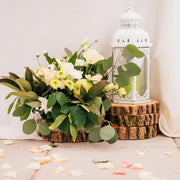
5 Perfect Rustic Wedding Decor for the Perfect Wedding
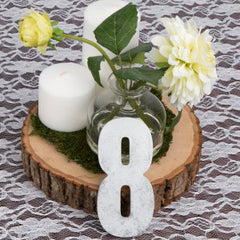
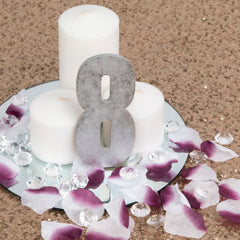
Wood Slab Centerpiece Bases are the finishing t...
It’s no secret that our curly willow items are insanely popular! With curly willow’s winding and voluminous curls o...
Mocha Lamour Satin Linens, New Arrivals
It’s a question I hear all of the time, and yet my answer rarely changes: “...
New Glitz Sequin Emerald and Willow Green Colors
Talk about love at first sight! I have been completely crazy a...
CV Linens Exclusive: Rhinestone Ruffles
The newest addition to the CV Linens line-up is here to dazzle your high co...
Glitz Sequin Table Runners and Overlays
There is no such thing as a “one size fits all” special event decor, wh...
Polyester Table Decor for 60" x 102" sizes
We are pleased to add an all new 6 ft table cover 60″ x 102″ size to ...
New Product Line - Petal Circle Taffeta
We’re ringing in spring by bringing six new candy-sweet pastel colors t...
Expand Your Collection of Pipe and Drape Backdrops
Get ready to expand your decor wishlist!
With the success of ...
Sequin Fabric in Two New Styles
There’s nothing more magical than sequin fabric. This is why we are pleased to ...
Wholesale Lamour Satin Linens
Our customers begged for more wholesale linens in Lamour Satin, and we are plea...
Welcome Pastel Yellow, Pastel Pink, and Peach!
Are you ready for the sweet sherbet hues of Spring?
We have you ...
Meet The Wave Satin Tablecloth!
The Wave Satin Tablecloth embodies the textured look gracing the pages of Brida...
Ribbon Embroidery with Sequin
This weeks new arrivals have “glamour” written all over them! Our first new arr...
Ruffles and Stripes and Sequins
Oh my! It’s that magical part of the week again where we bring you our latest and g...
Today is like Christmas morning here at CV Linen’s headquarters; we all gather around waiting to see what...
In this week's edition of New Arrival Wednesday, we worked hard to make customer requests come true. We have reva...
It’s an exciting day to plan a party with our gorgeous new arrivals that are ready to dazzle their way into...
We have new additions this week that will truly LIGHT up your event and make it shine. If you follow us on Instag...
Fall officially beings on September 23rd this year, which means it’s time to start planning your autumn décor befor...
We’ve been getting quite a few new arrivals in lately, and we couldn’t be happier about them! This week we’ll present...
While it’s true that summer is quickly approaching its final days and autumn is on the horizon, we still have some ...
For our new arrivals this week we’re going to throw it back to basics with some fresh solids we’re sure you’ll l...
We hope your week is going well and you’re finding some time to enjoy the Summer sun. There are some major new item...
We’ve heard from many of our customers on Instagram and Facebook and are so glad everyone’s favorite items were s...
We hope this week is treating you well so far. Even among the chaos of our busy season we’re still working hard on a...
Ruffled Sheer Organza Overlay & Chair Covers
We’re so excited to announce that we’ve expanded upon our Organz...
We’ve had some 100% brand new, colorful arrivals come in since our last post to bring you an even larger selection o...
We’re getting tons of new items in here lately for Summer, and we may be a bit biased, but they’re amazing! We’re so...
This month, we have stayed busy with new arrivals. We are excited to share them with you!
New Wholesale Pipe and Dr...
New Black and White Houndstooth Satin
Bring an air of class and refinement to your decor with our new Black and W...
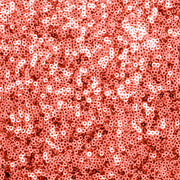
Welcoming Coral Sequins Additions!
We can’t get enough Coral, which is why we’ve added Coral to both our Glitz S...
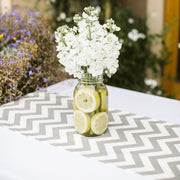
Bold Wedding or Event with Modern Patterns!
Chevron, to Greek Key, or stripe napkin, we have you covered!...
Beautiful and Soft Organza!
This week we received our newest colors in Organza. We have added Baby Blue, Cor...
We are ecstatic to share with you our expanded Wholesale Sequin line. We have added many new colors and sizes to...
New Taffeta Material Line
We have our new (plain) Taffeta line available in tablecloths, table overlays, table ...
Material Spotlight: Metallic and Rhinestone
Metallic Spandex Chair Covers
Introducing our mod metallic spandex b...
Stunning Events with Newest Arrivals!
Pipe and Drape Sets
We have been waiting excitedly all year for our pip...
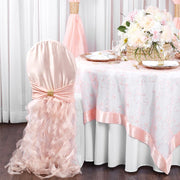
You asked, and we were happy to oblige!
We know Blush is IN for this year's wedding season, and so we are ha...
New Wholesale Burlap!
We have expanded out newest item of wholesale burlap items with our new Fitted Burlap Table S...
It’s a fantastic day to create a glittering tablescape!
We’ve added three new colors to our Glitz Sequin ...
A San Angelo Wedding to Remember
July 8, 2017 was a beautiful day for Mr. and Mrs. Jeffrey and Sarah Mercado! CV Lin...
In case you missed it, Yandy Smith and Mendeecees Harris of VH1’s hit show Love & Hip Hop tied the knot in a live...
CV Linens Employee Spotlight, Carmen
Welcome to another CV Employee Spotlight, the perfect place for showcasing a fr...
CV Linens Specialist Spotlight: Juliette
Superior linens are not the only place we invest in quality! Our amazing, ...
CV Linens Customer Care Specialist Spotlight: Mayra
With such diverse and unique personalities here at CV Linens we...
Distinctive Decor Rental's Charming Princess Baby Shower Showcase
Some events are so memorable they stick...
Behind Every Great Design is an Even Better Planner
We recently h...
Quality Photos Are an Event Planner’s Secret Weapon
As with all of the other growing facets of this industry, we ha...
Meet Louisiana Event Planner Jessica Fontenot of Extraordinary Events by Jessica
A few short years ago, Jessica Fon...
The Signature CEO Conference Chief Event Officer Tara Melvin at the conference
Signature Chief Event Officer (CEO...
Introducing Boston Event Company Cruzan Affair
Sometimes a single event can alter the course of your life. Sister ...
Meet Ketty Contreras from Ketty Delights!
New York event planner Ketty Contreras is a woman with a plan. With an edu...
Tracy Griffin Interview from Distinctive Decor Rentals
Our interview with Tracy Griffin, the mastermi...
Yanilka Lozada, Founder of My Little Angel Decoration
One of the tried and true keys to success is to seek wisdom f...
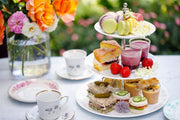
Make this year the perfect opportunity to establish a fresh tradition by hosting your very own Easter Tea Pa...
Valentine's Day, the most romantic day of the year, calls for special celebrations filled with love and affecti...
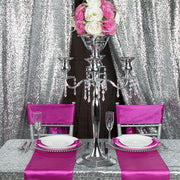
Try Gold Sequin and Black Rosette Look For Your New Year’s Decor
New Year’s Eve is everyone’s time to shine! Wh...
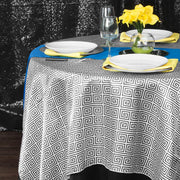
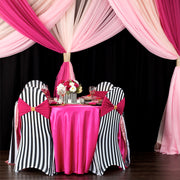
Incorporate Black & White Table Runners into Your New Year’s Decor
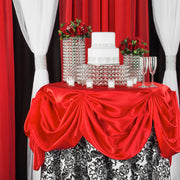
A well-placed dessert table can be the s...
Christmas doesn’t have to read Red and Green; our inspiration for this mock-up is based on the cool, glittering ...
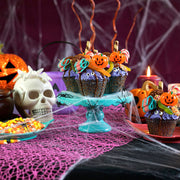
The witching hour is approaching, and you know what that means - it's time to plan a spine-tingling Hallowee...
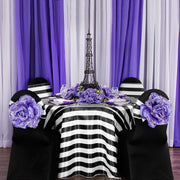
If you're thinking about throwing a Parisian-themed party, you're in for a treat! Paris, the city of love and lig...
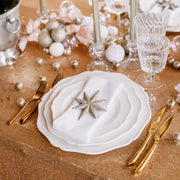
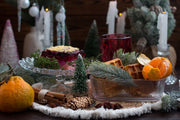
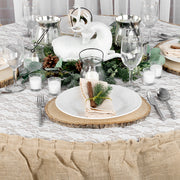
Winter is a season of chilly weather, but it's also a time to gather with loved ones and enjoy warm moments. One...
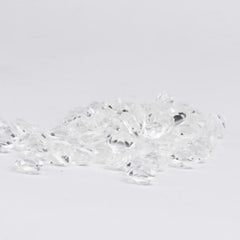
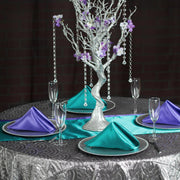
Crystal accents are a huge decor trend that won’t be going out of style anytime soon! Of these distinct dec...
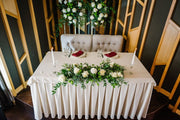
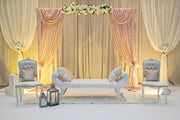
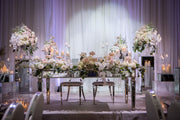
Sweetheart Table Decorations Doesn’t Have to Stress You Out
Planning your wedding or special even...
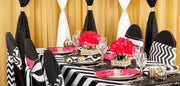
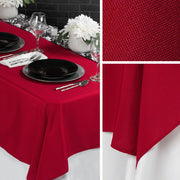
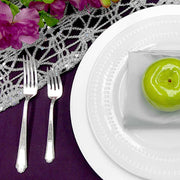
Try black table linens for a modern, elegant look that won’t break the bank. Don’t be afraid to go bold with mod...
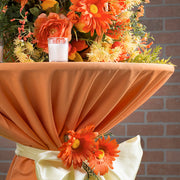
Orange table linens have a unique and vibrant energy that can transform any event into a celebration to reme...
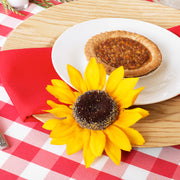
Happy National Pie Day!
Celebrating an unsung holiday is a great, offbeat way of bringing your friends and fami...
Explore the magical realm of enchanted garden party celebrations. Dive into the captivating beauty of an enchant...
Coral and Gray are burning up the wedding scene this year! If you are looking for a solution to staying on-t...
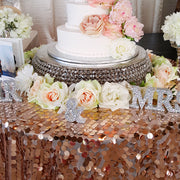
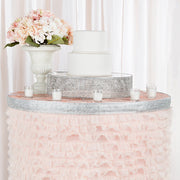
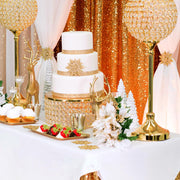
Are you getting ready for a special wedding day? Do you want your wedding cake table to be not just delicious but...
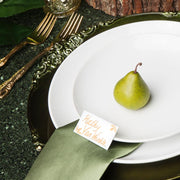
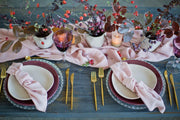
Fall weddings are charming and cozy, and one way to create a warm and inviting atmosphere is by incorporating ...
Are you excited about spring? It's a beautiful time of the year when flowers bloom, and nature comes alive. ...
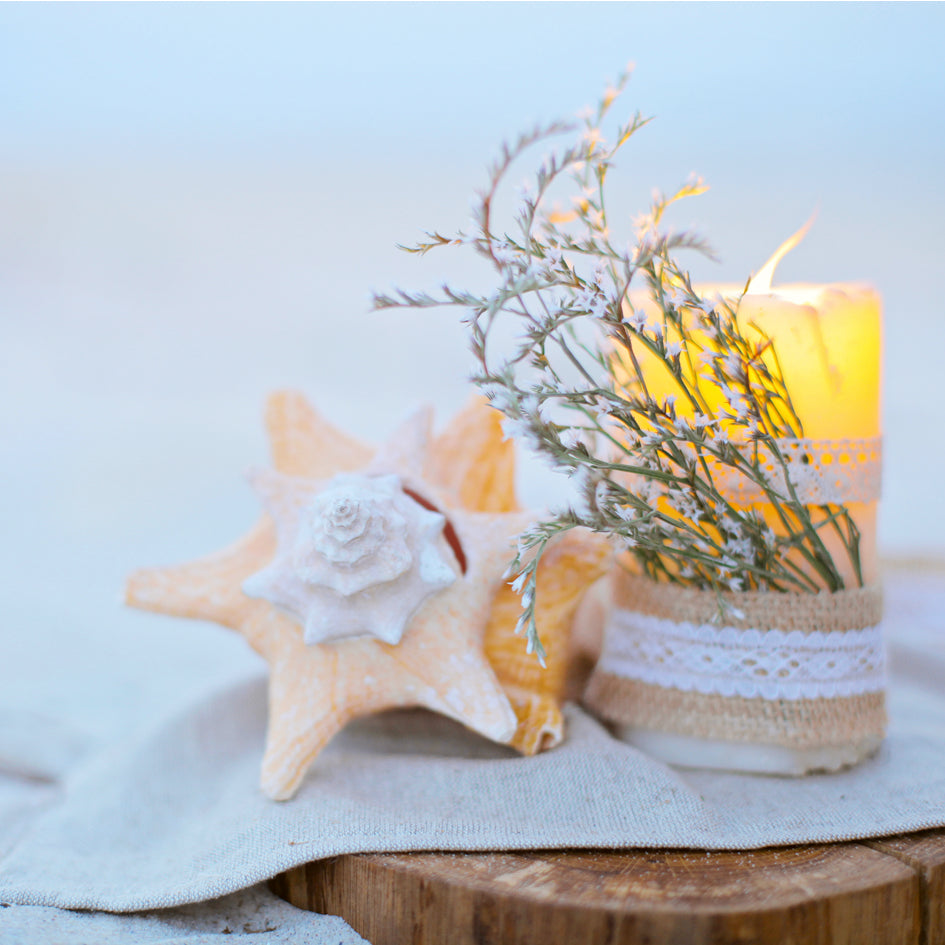
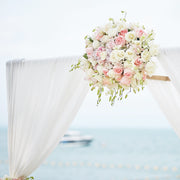
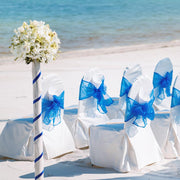
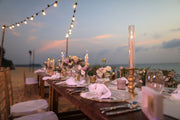
Seashells, fishing nets, and beach glass…the only thing missing from your beach-theme wedding is the ...
Certain style combinations blend perfectly, creating an enchanting and utterly unique ambiance. One combination ...
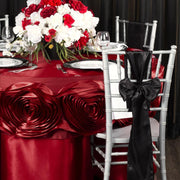
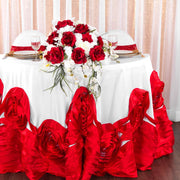
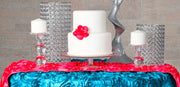
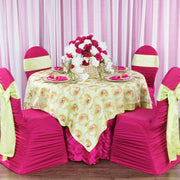
Trendy Cake Table ft. Rosette Satin
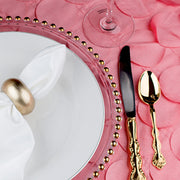
Texture, rich color, and an amazing price tag all in one. Rose...
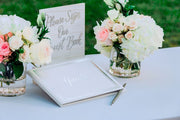
Are you planning your dream wedding and searching for unique and elegant ways to incorporate a guestbook table i...
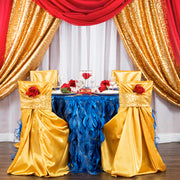
With the resurgence of classic fairy tales it’s easy to see why more and more people want a storybook ...
The idea of kids’ birthday party decor in apple green and fuchsia may seem like a garish undertaking, but wi...
Why Not Throw a Non-Traditional Galentine’s Day Party?
Whether you’re flying below Cupid’s radar or just want t...
Move over pink! We have found an edgy, feminine, and trendy take on your teen girl’s party decor.
These d...
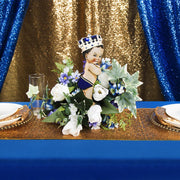
Little Prince Baby Shower
Are you ready to shake up the tradition of pastels and soft fabrics for baby shower...
There are two kinds of people who choose bold color palettes for their wedding or special occasion. There are t...
Black Stripe Sequins Tablescape Inspirations
I love glittery and sparkling things but sometimes…this lady needs...
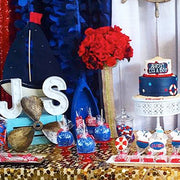
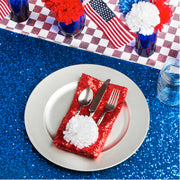
4th of July Tablecloth Accents
4th of July celebrations can run the gamut from a high-glitz firecracker of an a...
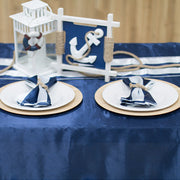
Ahoy! I Spy Nautical Father’s Day Decor
It can be tricky to pin down a perfect way to celebrate Dad o...
2016 Pantone's Summer Colors
This week, we’re taking on one of the summer’s freshest color palettes based o...
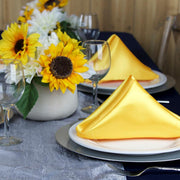
Mother's Day Linens Decor
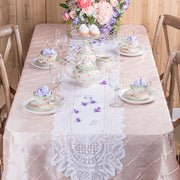
With Mother’s Day right around the corner, we use our Crochet Lace Runner to create t...
Mother's Day Inspired Decor
Mother’s Day is right around the corner! This means it’s the perfect time to start ...
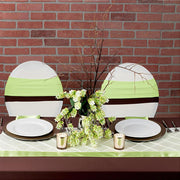
Combination Palette: Apple Green and Chocolate!
Peanut butter and jelly. Macaroni and cheese. Milk and cookies...
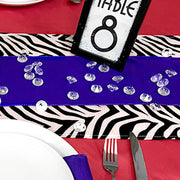
Get This Zebra Table Runner Look for $20
It can be hard to prioritize your decor budget. We try to assist...
Pink Napkin, Meet Navy Blue Tablecloth
Can’t decide if you want to go dark or light this spring wedding season?...
Try Pewter and Sangria for Spring
Spring doesn’t always mean pastel colors and daisies! Sometimes a nice neut...
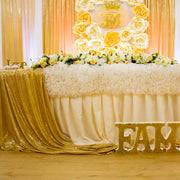
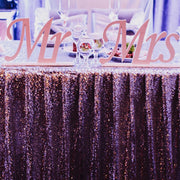
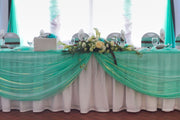
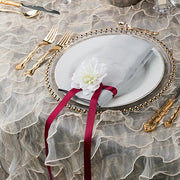
Spotlight Featuring Champagne Sequin Sweetheart Table
Today’s look was based on our rich shimmering Champagne t...
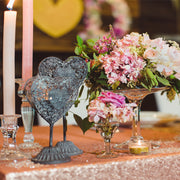
Our Valentine’s Day Look
As Valentine’s Day approaches, we realize the kitsch of Cupid and red hearts doe...